
박민혀기
Setup Guide for YDLIDARG2 Product Use in Raspbian 본문
Setup Guide for YDLIDARG2 Product Use in Raspbian
박민혀기 2024. 2. 16. 15:03Setup Guide for YDLIDARG2 Product Use in Raspbian
Hardware : Raspberry Pi 4 Model B
OS : Raspbian(32bit)
Lidar : Ydlidar G2
1. Raspbian porting on RaspberryPi4
기본적인 포팅 과정과 같으니 생략.
Raspbian 32bit로 설치!(64bit 설치시 pip 및 ydlidar 라이브러리 참조 에러 발생)
2. YDLidar-SDK install
우선 Ydlidar-SDK를 다운로드 받는다.
$ sudo apt-get install -y git
$ git clone https://github.com/YDLIDAR/YDLidar-SDK.git
3. CMake install
$ sudo apt install cmake pkg-config
4. Python & Swig install
swig는 C/C++을 파이썬과 연결/교류 시켜줄 수 있는 체인 같은 거라고 생각하면 편함
$ sudo apt-get install python3 swig
$ sudo apt-get install python3-pip
5. Build YDLidar-SDK
$ cd YDLidar-SDK
$ mkdir build && cd build
$ cmake ..
cmake는 금방 끝날 것이다.
계속해서 build 폴더에서 make와 sudo make install을 실행
$ make
$ sudo make install
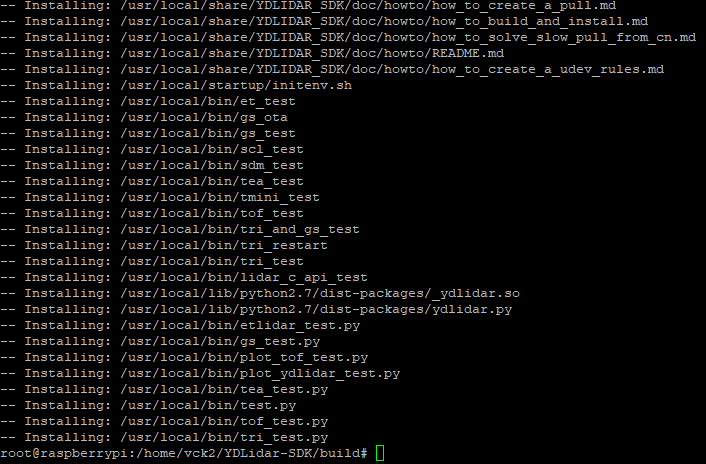
위와 같이 결과가 나오면 정상적으로 build가 된 것이다.
6. Install the Python API
build폴더의 상위 폴더인 YDLidar-SDK로 이동 후 진
$ cd YDLidar-SDK
// $ cd ..
$ pip install .

//만약 가상환경 에러가 발생한다면 아래 명령으로 강제로 설치한다.
$ sudo pip install . --break-system-packages
pip install .은 시간이 좀 걸린다 1~2분..?

7. Testing
파이썬 예시 파일들이 있는 폴더로 이동
$ cd YDLidar-SDK/python/examples
처음으로 test.py 파일로 테스트해보았다.
에디터로 test.py를 열어보자
import os
import ydlidar
import time

ydlidar.os_init();
ports = ydlidar.lidarPortList();
port = "/dev/ydlidar";
for key, value in ports.items():
    port = value;
laser = ydlidar.CYdLidar();
laser.setlidaropt(ydlidar.LidarPropSerialPort, port);
laser.setlidaropt(ydlidar.LidarPropSerialBaudrate, 230400);
laser.setlidaropt(ydlidar.LidarPropLidarType, ydlidar.TYPE_TRIANGLE);
laser.setlidaropt(ydlidar.LidarPropDeviceType, ydlidar.YDLIDAR_TYPE_SERIAL);
laser.setlidaropt(ydlidar.LidarPropScanFrequency, 10.0);
laser.setlidaropt(ydlidar.LidarPropSampleRate, 9);
laser.setlidaropt(ydlidar.LidarPropSingleChannel, False);

ret = laser.initialize();
if ret:
    ret = laser.turnOn();
    scan = ydlidar.LaserScan();
    while ret and ydlidar.os_isOk() :
        r = laser.doProcessSimple(scan);
        if r:
            print("Scan received[",scan.stamp,"]:",scan.points.size(),"ranges is [",1.0/scan.config.scan_time,"]Hz");
            for point in scan.points:
                print("angle:", point.angle, " range: ", point.range)
        else :
            print("Failed to get Lidar Data")
        time.sleep(0.05);
    laser.turnOff();
laser.disconnecting();
생각보다 간단하게 구성되어 있다.
여기서 중요하게 봐야하는 것들이 몇 개 있다.
1. import ydlidar
ydlidar에서 제공되는 python 라이브러리를 추가하는 단계이다.
(가이드 1에서 말했듯이 Raspbian 64bit로 설치하게 될 경우 최종적으로 이 과정에서 ydlidar 패스를 찾지 못한다.)
2. 12, 15 Line
스캔하기 전에 모터와 레이저의 셋팅 값을 설정하게 된다. 그 과정에서 유의 깊게 봐야할 것이 12, 15번 줄이다.
Line 12 : UART Baudrate을 설정하는 코드이다. 115200bps로 2바이트를 동시에 전송하기 때문에 230400bps를 사용하는 것 같다.
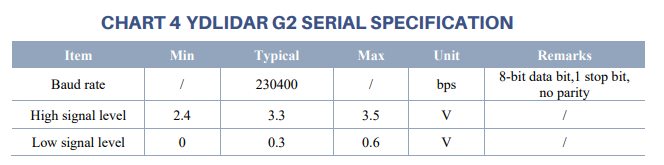
Line 15 : Scan Frequency를 조절하는 코드이다. G2는 Scan Frequency와 Motor Frequency(Motor Speed)가 같은 뜻이다.
Data Sheet에 보면 보통 7Hz로 사용한다고 되어있다.

8. Finish
test.py 코드를 실행하게 되면 모터가 정상적으로 돌며 데이터 값들이 출력 되는 걸 확인할 수 있다.
$ python3 test.py
참고 : https://www.youtube.com/watch?v=0eQwN0GFecE
'CELLON Kart(Tracking) > LIDAR' 카테고리의 다른 글
| YDLidar Application with OpenCV C++ (0) | 2024.02.22 |
|---|---|
| Control the YDLIDAR on C++ (0) | 2024.02.22 |
| MasterPlan (0) | 2024.02.21 |

